Showing posts with label Your Next Stamp. Show all posts

Friday, June 5, 2020

More Notecards!

Hello!
I've been having so much fun making sets of cards lately whether it's a new technique or just to play around. Today I wanted to use my Art Impressions "Block Letter Die Set" as I haven't pulled them out in ages. These cards came together fast and are perfect to send little messages.
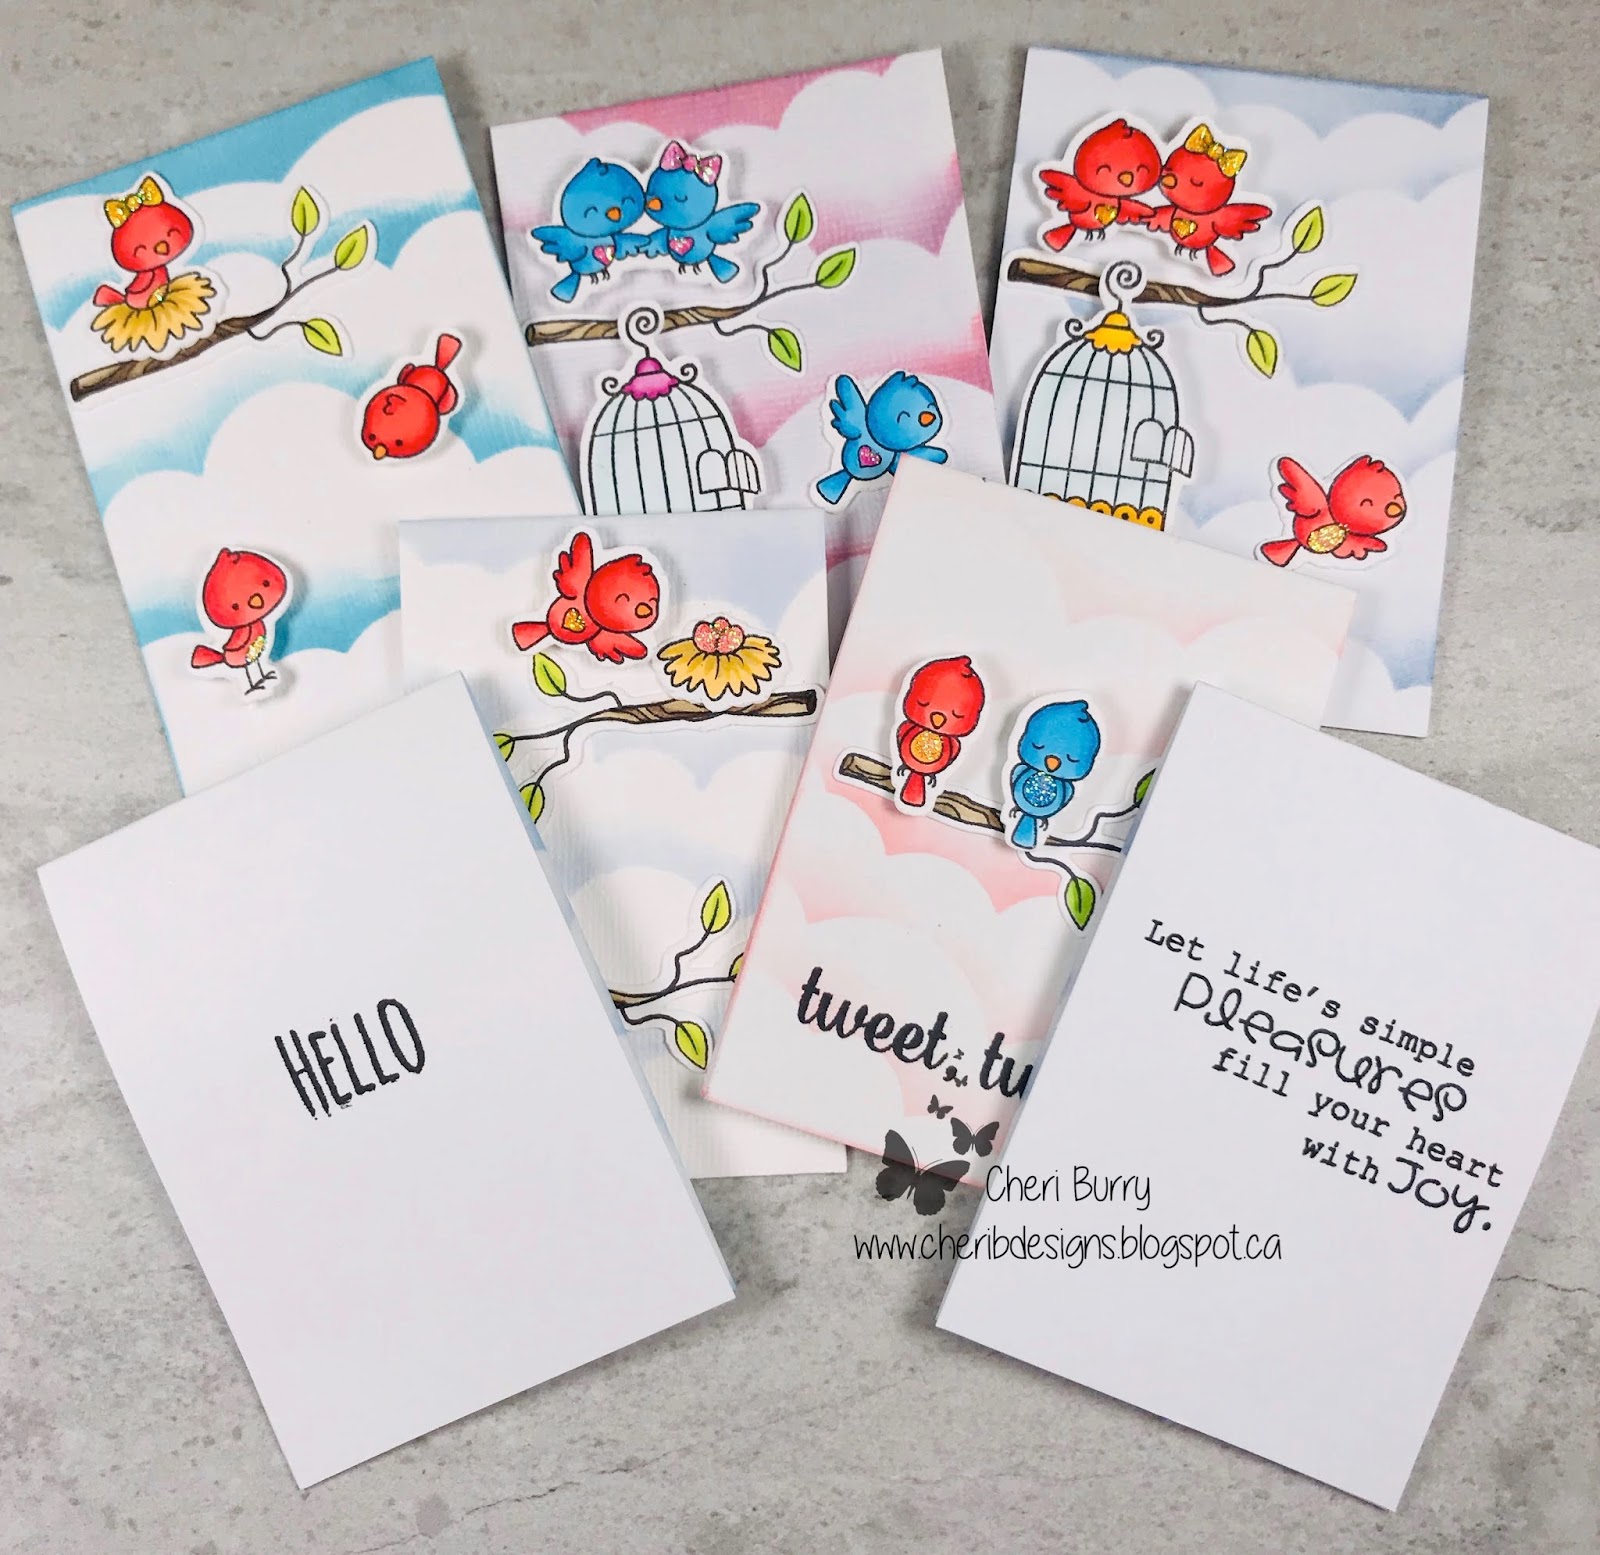
I chose papers from the Doodlebug "Simply Spring" 6x6 collection. I cut the words out of the patterned paper and used matching papers behind them. I used some Pretty Pink Posh Stitched Border dies and twine to make each card a bit different. It was fun to colour up the Your Next Stamp "Spring Birds" and cut them out with the matching dies. These cute birds are small and simple to colour. All the words and birds are popped up with foam squares to give the card added dimension.
These cards are so cute and came together very quickly as the design and colouring is simple. I love how fun and bright they are!
Copics Used:
BV11, BV13
BG11, BG13
RV52, RV55
YR07, Y32
E43, E44

Happy Stamping!

Sunday, May 17, 2020

Beary Special!

Welcome!
I'm so happy you stopped by today to see these "beary" adorable cards! This image from "Your Next Stamp called "Fairy Bear" is just too cute if you ask me!
I started by stamping the image and sentiment onto some Copic friendly paper and then cut it out using my MFT Zig Zag Square dies. Next using my Copic Markers I coloured this cuties in. I decided on papers from the Doodlebug So Punny 6x6 collection and went about creating some fun layers. You can't tell in the photos but on both their wings I added some Clear Glitter Pen for a bit of sparkle.
I love the little fancy doily dies on these cards.
I have a confession...... Originally I coloured this bear and then taking Copic Blending Solution and a rag I tried to make him look like he had fur. It was a total fail lol. So rather than throw him out I tried added tiny dots with a white and black gel pen to create texture. I am happy with how he turned out.
On the decorated insides I used a sentiment from YNS called "Sweet Hello". I have had this stamp for years. It was a purple rubber which YNS doesn't use anymore and I think this sentiment is retired.
Copics Used:
Flowers & Leaves: RV17, RV55, Y35, YG17
Ground and Outline: W1, W2/ B0000, B 000
Brown Bear Card:
Bear: E34, E35, E37, E39
Cats: N2, N3, N5/ E30, E31, E33
Wings: RV0000, RV000, RV00, RV21
Black Bear Card:
Bear: N5, N6, N8
Cats E37, E95, E97, E99/ E31, E33, E34
Wings: BG0000, BG000, BG02, BG10

Thanks for stopping by today!
Happy Stamping!


Sunday, April 26, 2020

Have A Mice Day!

Hello  Friends!
Just popping in to share this fun and bright card using the "Flowers and Smiles" stamp set from Your Next Stamp. I've used this set before and you can see more of my cards using the stamp set HERE. I love this cute mouse chasing a butterfly! It just screams Spring to me.
The images I used are separate stamps and I stamped them to create a scene. Next I coloured the images with my Copic Markers. I created some "masks" for the images using masking paper. Then I added the clouds in the background using the Hefty Doodle "Cloudy Skies" stencil and some Salty Ocean Distress Oxide Ink. I turned the bottom of the clouds into some hills by colouring them in with Copics. A piece of paper from the Sunny Studios Preppy Prints and a nice big bow finish off my card.
The sentiment on the inside is also from the "Flowers and Smiles" stamp set.
Copics Used:
Mouse: E31, E35, E57, E79, R22
Butterfly & Flowers: BV11, BV13, BV17/ Y32, Y35, Y38/ YG25, G46, G28
Grass & Hills: G40, G82, G94, G99

Thanks for stopping by and I hope you have "A Mice Day"!
Happy Stamping!


Sunday, April 12, 2020

Waving Hello!

HELLO!
I made this card to send to my dear friend. With all the "social distancing" and self isolation we haven't been able to get together. Since we don't live near each other anymore, we try to stay connected by meeting once a month for lunch and a gab fest! Talking on the phone just isn't the same as actually seeing your bestie! This adorable image and sentiments are from the Your Next Stamp "Waving Hello" stamp set. 
I stamped my image and added the sentiments to the paper before cutting it out. Copic Markers were my choice of colouring medium today. I love the fun and bright papers that are from the Doodlebug "Fairy Tales" 6x6 collection. Some yellow twine and Doodlebug Heart dots finish off my card.
I thought the sentiments were perfect for the times we are in right now with the Covid-19 Virus.
Copics Used:
Skin: E00, E21, E11, R20
Hair: Y00, Y21, YR12
Dress: BV13, BV17, RV06, RV09
Dogs: C0, C1, C2, C3, C4/ E34, E35, E37/ N4, N5, N6, N8
Cat: E93, E95, E97, E99
Chick: Y35, Y38
Ground & Outline: W0, W1, B000

Thanks for stopping by! Stay safe and healthy!
Happy Stamping!


Friday, April 10, 2020

Hedgehugs!

I'm popping in today to share a set of adorable cards I made using the Your Next Stamp set called "HedgeHugs". I love the Spring feel to these cards! Winter is always too long as far as I am concerned!
I'm using paper today from the Echo Park Spring Fling 6x6 collection. It's an older collection but still just as pretty and springy! Anything plaid or gingham always catches my eye. I stamped and coloured my images and then using Craftin' Desert Divas Stitched In Circle die set cut out the images. Some fun gems from Little Things finish off my design.
On this card I stamped the "Thank You" into the middle of the flower circle. Then I coloured the Hedgehogs and fussy cut them out. Next I popped them up with foam squares for some added dimension to my card.
On this card I stamped a hedgehog into the middle and popped up the sentiment.


CopicsUsed:
Hedgehogs: E30, E31, E35, E37, E59, R20
RV23, RV25, YR68, C1, R22, R24
YG17, YG23, YG25, G29, 
Y17, Y23, Y35, Y38
BG10, BG11, BG53, BG57

Happy Stamping!

Friday, March 6, 2020

Sweet Friend!

Hi!
Don't you just love these sweet mice?!!! I've had these cuties for awhile now and thought it was time to get them inked and coloured up! These are from the Your Next Stamp "Flowers and Smiles" stamp set. 
Look at all these cute images! So many variations you can make with just one set!
Both cards have a simple design with only 1 layer of patterned Designer paper from my stash. and some matching cardstock. A bit of twine finishes off my CAS design,

Copics Used:
Mice: E31, E33, E35, R22/ C1, C2, C4, R22
Flowers: RV 14, RV17, RV19, BG05, Y38/ BV11, BV13, B21, Y35
Leaves: G43, G46/ YG03, YG05
Pot: E95, E97, E99

Thanks fro stopping by today!
Happy Stamping!


Sunday, December 22, 2019

Just A Note!

Hi!
Just popping in today to share another cute set of cards made using the "Just A Note" set from Your Next Stamp. These bunnies are so sweet they just make me happy! I coloured each one using different techniques.
Although I coloured each Bunny different, I kept them consistent by using matching papers from the Simple Stories "Heart" 6x8 collection. I added Clear Glitter Wink of Stella to each pencil and some enamel dots on each card.
I decided to colour this bunny using a "stippling" effect. I took my Copic Markers and just added little dots in shades of grey. 
This little cutie is coloured using Copic Markers in the traditional way by blending the alcohol inks.
For this card I started by first colouring the bunny part of the image. Then I took some Copic Blending solution and a terry washcloth and dabbed it over the image to give it a furry look.
Copics Used:
White Bunny: C0, C1, C2, C3, C5, R01, R02
Grey Bunny: N1, N3, N4, N5, N6, R01, R02
Brown Bunny: E23, E25, E27, R01, R02
Pencil: YR21, YR23, YR24/ E30
Outline: B0000, B000

Happy Stamping!

Friday, November 22, 2019

Tweet Holiday!

Happy Day!
I'm back with another Christmas themed card. I love making Christmas cards, there are just too many cute images to use and "Tweet Holiday" from Your Next Stamp is no exception! I love how the one hat is over the bird's eyes LOL.
I decided to make two different coloured images and matched papers from the Echo Park "My Favourite Winter" and "A Cozy Christmas" 6x6 collections. I kept the design the same, but they still look a little different than each other. I added Stickles to the trim on their hats for a bit of bling!
On the decorated inside I used the adorable sentiment that comes with the set. 
Copics Used:
Reds: R37, R59, R89/ R24, R29
Blues: B34, B37, B39/ B000, B01
Greens: G94, G99
Beaks and feet: YR04, YT07
Branch: E43, E44, E47


Hope you have a "tweet" day!
Happy Stamping!

Sunday, November 3, 2019

Be Merry!

Happy Sunday!
Now seriously how cute is this stamp! I love the little mice peeking out from the Christmas wreath. This is the adorable stamp set called "Sending Joy" from Your Next Stamp!
I always start my card making by first picking my image. Then I choose what papers I would like to use and colour the image to match. For my card today I used papers from the Photoplay Holiday Cheer 6x6 collection. My card design is simple yet effective to showcase the "Sending Joy" image. I fussy cut my image using my Brother Cut N Scan machine and popped the image up with some foam squares. I added some Stickles to the little berries, Santa hat and a few enamel dots to finish off my card.
The "Sending Joy" image comes with 2 sentiments so I used one on the outside and one on my decorated inside.
Copics Used:
Mice: T1, T3, T5/ E31, E33, E34, E35/ R01, R02
Hat & Bow: R35, R37, R39
Poinsettia & Berries: R37, R59, R89, Y17
Greens: YG23, YG25, YG61, YG63, YG67

Thanks for stopping by today! Hope you have an amazing day and....
Happy Stamping!

Sunday, September 15, 2019

RAOK Cards!

Happy Day!!
I want to share with you today a group of 21 little cards (2.5 x 3.5") that I created to be used as a Random Act of Kindness (RAOK). We live in such an awesome community and I wanted to surprise and hopefully bring a smile to someone's face. I've been working on this project for a little while now. I find I would work away at it in-between other projects but last week went full out and finished them all! Now to just randomly leave them places for someone to find!
I love the fun and cute images that I used and paper from my stash! Each card has some sort of embellishment. It could be enamel dots, Stickles or a bow.
This set is made from the Gerda Steiner Designs "Turtley Great" stamp set.
I love the sentiments that are included with the set!
These cuties are from Craftin Desert Divas. Unfortunately when I went to link the images she has closed her shop.
Super cute sentiments to go with the images!
Love these birds from Your Next Stamp called "Spring Birds"
On these cuties I made ink blend cloud backgrounds!
This set of stamps is from Simple Stories and is called "Happy Kids".
The stamp set doesn't have sentiment with it so I looked through my stash and used the ones shown.
I made all my little envelopes using the We R Memory Keepers "Envelope Punch Board".
I put a little note I printed from my computer on the inside that says "lease enjoy this random act of kindness. Pay it forward with a RAOK of your own". On the back of the card instead of using my personalized stamp, I made a sticker that says "Kindness is a gift that everyone can afford to give". After all I don't want anyone to know who the card is from.
Each envelope is sealed with a sticker I made that just says "Random Act of Kindness". Now I must tell you both the stickers are not my design but something I found online, downloaded the image and then printed it on some sticker paper that I had.


Thanks for stopping by and remember "How beautiful a day can be when kindness touches it"!

Happy Stamping!