Monday, March 10, 2014

Onion Envelope


I recently found an online class by Virginia Nebel titled “Onion Envelope Workshop”. It’s a mini album of sorts that “peels” away layer by layer to hold all your special memories. The best part is that it will fit into a standard size envelope to mail to that someone special. I thought I would give it a whirl for something different to try. I had so much fun putting my envelope together and actually got carried away with decorating it. I created a Paris theme with my envelope and it can hold 13 pictures of various sizes. 


The instructions were very easy to follow and I know I'll be making another one soon! Hope everyone is doing well and enjoying this warmer weather we've been having!
Chat at you soon!
Cheri


Monday, March 3, 2014

Birthday Wishes

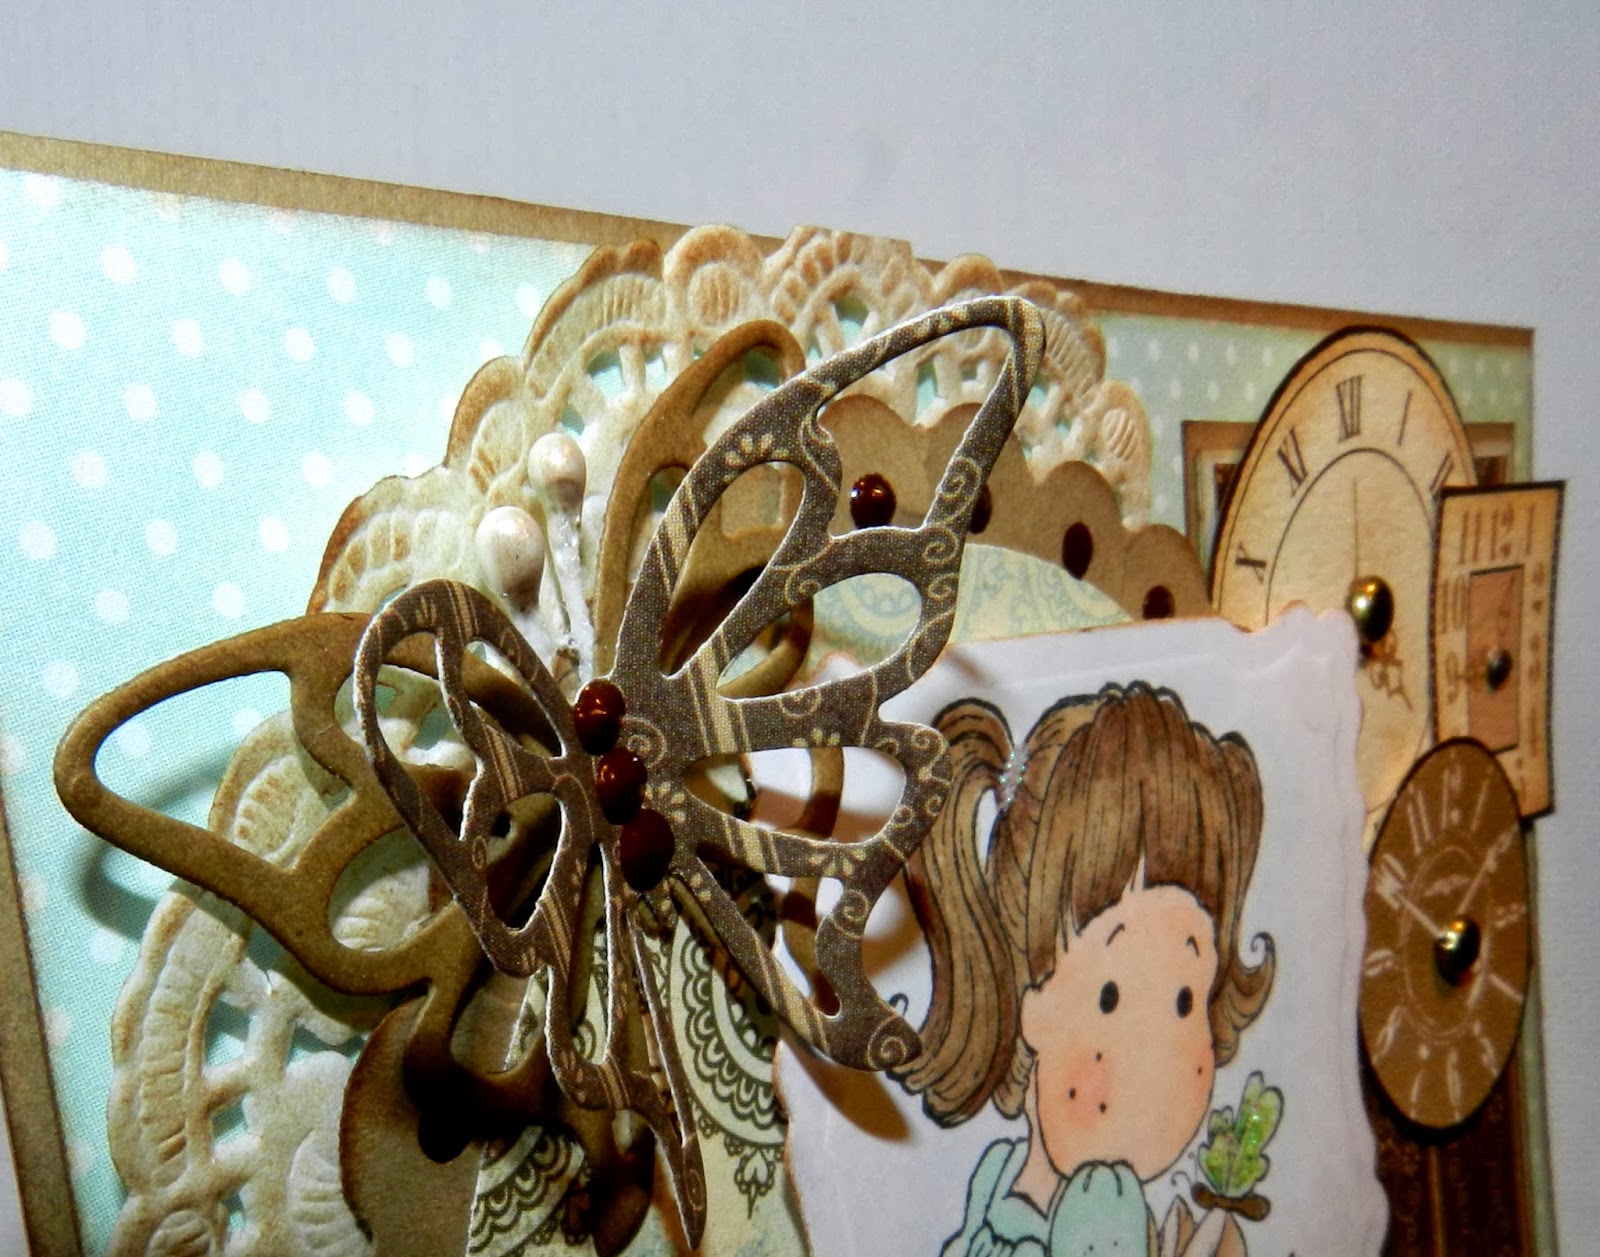
I was busy today working on the Easter cards for my Husband's clients when I decided I needed to take a break. I decided to try to enter some more challenges and came up with this design.


This card falls under the requirements for a few challenges this week/month at various blogs, and I am excited to enter it and see what happens. Don't forget to click the links below to check out the Challenges at these blogs, I know they would love for you to have a look.
  • At Simply Magnolia the challenge is to use Kraft paper and incorporate 2 more colours along with of course a Magnolia Stamp. I used the Kraft paper to layer under my patterned paper, one of the butterflies and the border around the circle piece. My two colours are a darker brown and a minty blue. 
  • At Tilda's Town Challenge #94 is to use things from your stash which of course was no problem as let me tell you….I have a big stash of stuff that I have accumulated LOL! 
  • Stamp and Create with Magnolia's challenge #26 is to use a birthday theme and magnolia stamp. 
  • Anything goes at the Marvelous Magnolia Challenge #62, so this card works well for their challenge as well. 
  • At Simon Says Stamp Monday Challenge the theme is Tick Tock. The design is to be anything time inspired. 
  • 7 Kids College Fund Challenge #94 is anything goes and to use a stamped image that they carry in their store.
  • Kit and Clowder's Challenge for March is Wings. So as I have butterflies on my card I figure I got the "wings" thing covered.
Here's the items I used to create my card.

Kraft Card stock (my stash)
light blue card stock (my stash)
Fancy Pants "Summer's End" 6x6 paper pad
Bazzill Basics Paper 6x6 "Timeless" paper pad
Magnolia Stamp: Hello Little Butterfly
Memento Tuxedo Black ink
Hampton Arts Rust ink pad
Brown ribbon (my stash)
Bow Easy
Pop dots from The sticky Stuff Store
Liquid Pearls: Bisque
Stickles: Crystal
Viva Pearl Pen: Dark Brown


Hero Arts: Clear Design Bird Branch Alphabet
Echo Park "Dots & Stripes" 6x6 paper pad
Tim Holtz Distress Ink: Vintage Photo
Brads (from my stash)
Happy Birthday Stamp from Paper Smooches "Sentiment Sampler"
Die-namics Circle Stax2
Spellbinders: Opulent Ovals
Spellbinders: Labels 29
C.C. Designs Butterlies Die

Face: E000, E00, E01 R20
Hair: E43, E44, E47
Dress: G0000, G000, G00, G02
Bow &Boots: E40, E41, E42, E43
Butterfly: G00, G02
Ground Shadow: E40, E41, E43
Image Shadow: B0000


Whew, that was a long entry LOL. Hope you are keeping warm, spring is coming soon (I hope).
Take care and chat at you soon!
Cheri

Wednesday, February 26, 2014

Crafty Wednesday!

I made this tag today with my Prima Doll Stamp and matching Prima Tags. I wanted to enter the Monday and Wednesday Challenge at Simon Says Stamp. Mondays challenge is to create using your stencils and paste to add texture to your project. Wednesday's challenge is "anything goes with pearls", so this tag fits the bill for both challenges.
I used the Julie Nutting Tag pad for the base. I sprayed a honeycomb stencil with Tim Holtz Adirondack color wash in butterscotch. Then I used Amethyst Color Shine by Heidi Swap and added a few hearts with another stencil. I also used a clock stencil and pink acrylic paint. I stamped a chandelier and script onto the tag next. I took my molding paste and added 2 bird cages for texture and depth. I love the Prima dolls and stamped one of my "girls" onto Copic paper and coloured her with my Copics. I paper pieced her dress and head band. Using embellishments and die cut pieces I "fancied"up my tag. Of course last but not least I added pearls, pearls and more pearls.


I am pleased with the end result and as always had a blast creating. Like I mentioned earlier in the month I am trying to use items that I have "accumulated" and create amazing things!

Chat at you later
Cheri

P.S. I entered this tag in : click the links to go to their blogs


Tuesday, February 25, 2014

Another card!

I just loved the flower stamps that came in my Simon Says Stamp monthly card kit, that I got them back out and made another card with them today. My stamping experience has been mostly limited to stamping an image and colouring it. It's been fun to play with just using stamps and coloured ink pads.


I left the inside blank so that you can use it as a note card and hand write a message. I've been working on some mixed media pieces in my art journal but I'm not ready to show case them yet. Nothing ever turns out like the vision I have in my mind LOL. I have to figure out the creative process a bit better first. Any who……. have a great day and I'll chat at you later!
Cheri

Monday, February 24, 2014

Get Well Card

Today I decided to make a card for the Tilda's Town Challenge #93 "Anything Goes". I recently bought this Tilda Stamp and decided to use her for today's Card Challenge. The only requirement was to have a Magnolia Tilda or Edwin stamped image as your focal point.


 Click to go to Tilda's Town Challenge Blog

I think she is so cute and would be happy to receive her get well good wishes wouldn't you?

Chat at you later!
Cheri

Thursday, February 20, 2014

February Card Kit

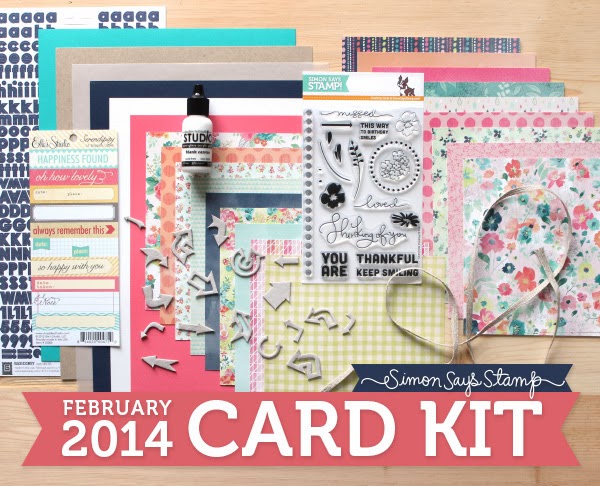
A few days ago I received my February card kit in the mail from Simon Says Stamp! It was a little late coming but Wohoo, I love getting things in the mail that aren't bills LOL.

  February Card Kit
Click the image to see Simon Says Stamp Card Kits
Today I had a bit of time so I got the kit out and created these two cards from the stamps and papers. I must say I am impressed with the kit and all that it contains. The papers, stamps and embellishments are very good quality. 


 I left the inside of the cards mostly blank, stamping a few flowers in the corner. This way it leave a nice amount of space so you can write a note to that special someone.  


I can't wait to get March's kit in the mail and see what I can create with it! My Nephew is coming for the weekend and I am so excited! He's a great kid and we will have a blast. Have a great weekend and chat at you later!
Cheri

Wednesday, February 12, 2014

My Last Valentine Card!

I made this cute card for my "sistah". It seems fitting that I used one of the Uptown girl stamps from Stamping Bella. This stamp is named "Uptown Girl Claudia Has a Candy. I changed her big Sucker into a heart for Valentine's Day. I'm part of Da Sistahood, are you?


Lots of love to everyone for Valentine's Day! Oh and hey ma sistah I love you tons, you mean everything to me!
Chat at you later,
Cheri

P.S. I entered this card in Bellariffic Friday Sketch Challenge


Tuesday, February 11, 2014

I've Got Another One

So I've been a bit busy crafting the last few days and I'm so happy that I've had the time to do so! Here's another Valentine Card I created. As you can probably tell I absolutely adore the Magnolia line of stamps! Sometimes it takes me a while to figure out the layout of a card but this one just came together no problem!


I entered this card in the Tilda's Town Challenge #91

Inside of Card


  • I made a 5 1/2" square card from Gemstones cardstock in pink diamond, then I started my layering. 
  • I used a piece of patterned paper from the Bo Bunny Crush Collection cut at 5 1/4" square as my first layer.
  •  I had a scrap piece of pink dotted paper that I used for my second and fourth layer cutting it with my Cuttlebug and 2 dies from the Spellbinders Decorative Layers 22 set. 
  • The third layer is cut from Spellbinders Label 22 set. 
  • I always like to take Tim Holtz distress ink and ink the edges of my layers as it seems to add a nice dimension to the project. 
  • I cut hearts from the Die-namics Heart Stax to use on the outside and the inside of the card as well. 
  • Using a piece of the pink diamond paper I ran it through the Cuttlebug using the Die-namics Sentimental Flourish and then cut it in half.
  •  I also made a small border for Tilda to lay on from the Die-namics Layered heart border. 
  • I glued the Bo Bunny paper, doily and the cut flourish together Taking the pearls I weaved them through the lace and then added them onto the paper. I then glued that paper set onto the card base. On the remaining 3 layers I used hexagon pop dots from The Sticky Stuff Store to layer and add more dimension to the card. Glue the heart border to the card.
  • I stamped XO on the small heart and heat embossed the inked image. Using pop dots again I added it to the card.
  • I stamped the Magnolia "Tilda with dot bow" onto Copic paper and coloured her with my markers.
    • Skin: E000, E0, E01, R20
    • Clothing: R81, R83, R85, R89
    • Heart: R83, R85, R89
    • Hair: E33, E35, E37, E39
  • Fussy cut out the image and glue her to the heart border.
  • I added Stickles in Crystal to the heart, her cuffs and the dots on her hair band
  • I think the inside of the card speaks for itself, just another Bo Bunny paper, hearts and a sentiment stamp.
I think Tilda turned out adorable and will be much loved by her recipient. (can't tell you who as they follow my blog "wink"). One more to make and then that's it for this year, whew! Have a great evening.
Chat at you later,
Cheri

Monday, February 10, 2014

Another Class Review Went Live


Hello everybody!
 Another one of my class reviews from The Art Studio at SNR went live. I took Dena Concienne's class How to Make a Pull and Tuck card. Dena's classes are wonderful! So head on over and check out my review!


Click here to see the review!    Cheri's review

Thanks everyone and chat at you later!
 Cheri

Valentine Card


I made this Valentine card for my Nephew. I always struggle to make cards for "guys". I tried to use darker colours so that the card wouldn't look too "girly", after all he is almost 13 so you do have to be careful (LOL).  I am so used to embellishing my cards and when you are creating for a masculine theme I always think the card looks too plain. I like how this one turned out though and I think He will love it too.
Supplies Used:
C.C. Designs Hogs & Kisses Stamp
Kraft Card Stock
Black glitter card stock
Red ink
Black Ink
Heart stamp
Red Stickles (on the arrow)
Glossy Accents (on the wings)
Red and Black twine
Copic Markers W7, W5, W3, W1, W0, R01, R29, B0000

One of my other New Year's Resolutions is to try to enter in some of my cards into different challenges from some of the blogs that I follow. I am going to try to enter this card in one of the challenges for fun. Gotta run get Hubby's supper going!
Chat at you later,
Cheri