Friday, March 16, 2018

Bake Some Memories!

Hello Ai Fans!
Just Popping in with another set of cards I made using the "Whisk It" set from Art Impressions. Yesterday I showed a project using the Stamped Girl image and today I am just using the little accessory stamps.
I created these cards to l look like the yummy baked goods are cooling on the window and more baking in the Kitchen oven. My paper is from the Carta Bella "Home Sweet Home" 6x6 collection. The window is an Art Impressions die called "Window Die". I created a cloud background using a Cloud Stencil and some Salty Ocean Oxide Distress Ink. I cut all my images out using my Brother Cut N Scan and added them to my little scene.
The papers remind me of vintage wallpaper and I tried to make the card look like a Kitchen wall with wainscotting.
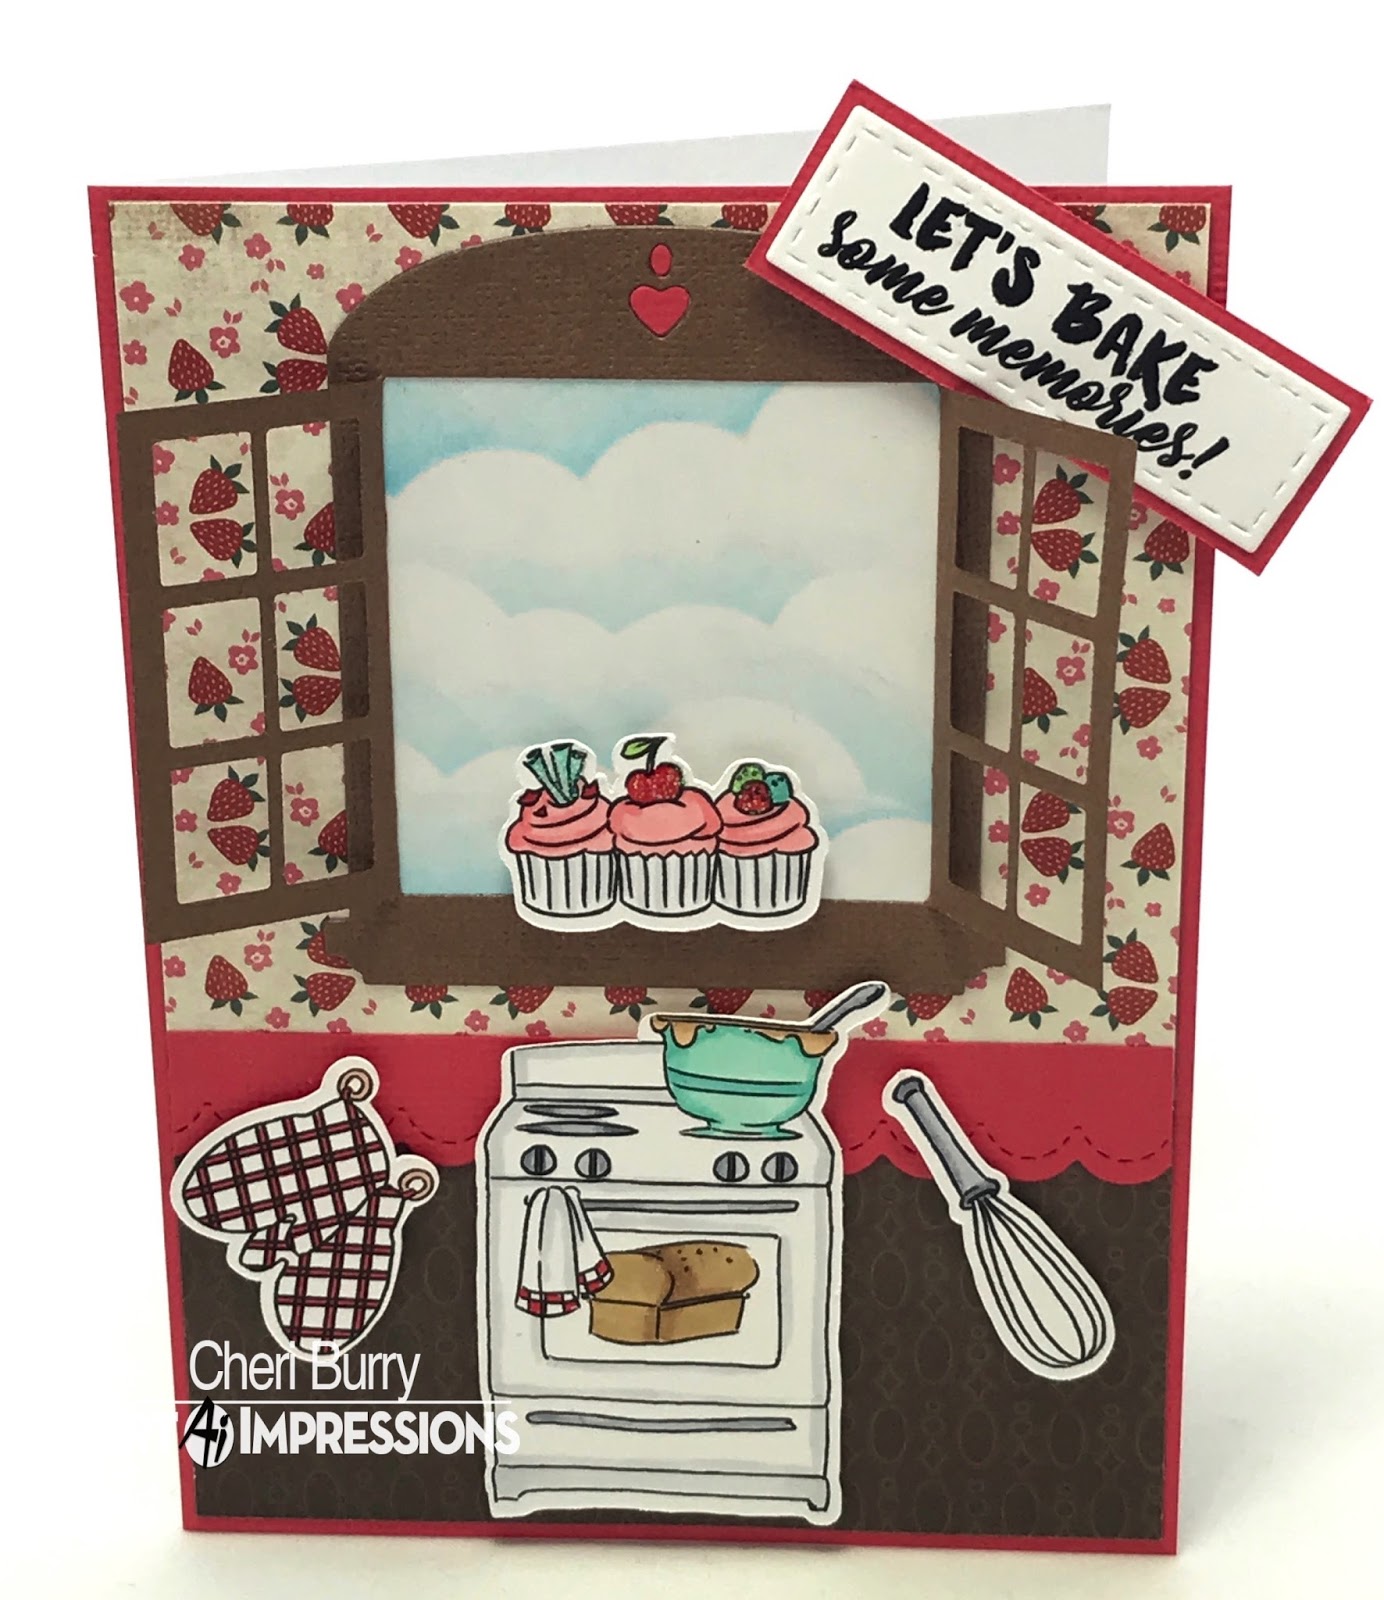
The cupcakes have some Nuvo White Blizzard Drops for added glitter.
Copics Used:
C1, C2, C4, C6
BG11, BG13, BG15
R21, R22, R24, R27
E53, E55, E57
YG13

Happy Stamping and Thanks for stopping by today!
Supplies:
Thursday, March 15, 2018

Whisk It Set & Tutorial!

Hi Ai Fans!
Today marks the New Release of the "Work and Play" stamp sets over at Art Impressions. I am using the "Whisk It" set on my front stepper card today!
I  love when Art Impressions does a stamp set as there are so many different combinations that you can make with all the images and sentiments.
I started by gathering up all of my supplies. I decided to use papers from the Doodlebug "Cream & Sugar" 6x6 collection.
 Cut a piece of pink cardstock at 4 1/4" x 11".  Next score the cardstock on its long side at the 1 1/4", 2 1/2", 4 1/4", 6" and 8 1/4" score lines.
Fold the lines with mountain and valley folds as in the picture. I used my bone folder to get crisp folds on the score lines. Next, cut a piece of cardstock at 4 1/4 x 5 1/4 to use as a card base.
Stamp your images with your preferred method. I happen to love my Misti for this! Makes it so easy! If you don't get a good first ink impression just ink and stamp again. Colour with your favourite colouring medium. I used my Copic Sketch markers, which happen to be my favourite medium!
You can either fussy cut out some of the images either with scissors or like me I used my Brother Cut N Scan machine.
Now that I have everything coloured, cut out and ready to go, I'm ready for the fun of assembling my card.

I matted some Designer paper with Blue Green cardstock and added Crystal Stickles to the cake and cupcakes.
I was getting frustrated with my card base as it kept sliding open too much. I decided to add a piece of cardstock that was 4 1/4" x 6 1/2". I scored one end at the 1" score line and folded it. Then I glued it to the inside of the stepper card bringing it underneath. 
I added a border edge popped up with foam tape and now I have what I call a Front Stepper Easel card! Solved the problem though now didn't it LOL!
Then I just added my main image and all my little cut out images with some foam tape for dimension!
When you "undo" the easel part everything folds flat so you can stick it in an envelope!
Copics Used:
E00, E11, E15, E17, E19, E21
RV10, RV11, RV25, RV29
BG45, BG49
Y13, Y15, Y17
YG23, YG25
N0, N1, N2, N4, N7, N9


Happy Stamping!
Supplies:

Tuesday, March 13, 2018

Easter Blessings!

Hello HH & OCS Fans!
I wanted to share another Easter Card with you today using the High Hopes stamp called "Carrot Patch". I think Easter is my favourite time of year to create cards for. It always is a sign of Spring and the images and papers are always so cheery!
I am using paper from the Doodlebug "Easter Express" 6x6 collection on my card today! I stamped and coloured my card with Copic Sketch Markers. I added some Spectrum Noir Clear Glitter pen to the flowers, butterflies and Easter egg for a bit of shimmer. A double ribbon bow and Pearl lace finishes everything off.
On the inside I am using the HH "Beautiful Blessings" sentiment
Copics Used:
Bunny: R01, R02/ N0, N01, N2, N3, N4, N5, white gel pen
Carrots: YR04, YR07, YR09
Flowers: RV06, RV09, Y35
Butterflies: BG11, BG13/ Y32, Y35
Leaves & Grass: YG21, YG23, YG25
Background: B0000, B00, B01

Follow the High Hopes Blog as the DT Divas will be bringing Daily Inspiration for the month of March. Don't forget to follow us on Facebook, Instagram and Printerest.

Happy Stamping!
Supplies:
Friday, March 9, 2018

Easter Mansion

Hi Ai Fans!
Today I wanted to share with you a fun project! I am using the Art Impressions "Holiday Mansion" and the "HM Easter set". I find it so fun and relaxing to create a little scene with these stamps and dies!  
I decided to stamp the Holiday Mansion onto my Designer paper from Echo Park called "Hello Easter". It adds a fun element to the house! Then I stamped and coloured all the little accessories from the "HM Easter" set and die cut them out with the dies that are included. Now all you have to do is have fun and put together you mansion. I decided to add a little fence and some grass for another cute element to my card. 
There is a lot of dimension to these cards. I popped up the Mansion, fence, shutters and grass with some foam tape. I also cut the shutters out of Designer paper as well.
Copics Used:
Bunnies: T1, T2/ E11, E13, E21 /R00, R20
YG23, YG25
Y13, Y15
RV23, RV25
BG13, BG15, BG18
E43, E47

 Happy Stamping!
Supplies:

Tuesday, March 6, 2018

Easter Greetings!

Happy Tuesday!
Easter is around the corner so I pulled out one of my favourite High Hopes Stamps to make this adorable Easter card. My card today uses the "3 Pane Easter" stamp!
I am using paper from the Doodlebug Bunnyville 6x6 collection and a PPP Story Book2 Metal Die to create my card with.  Since I wanted to use this die, I separated the images from the "3 Pane Easter" stamp and then cut them with the die so that they would fit. I used the HH "Easter Greetings" in the largest pane. A cute 6 loop bow finishes everything off. 
On my decorated inside I used the HH sentiment called "Hugs Kisses Easter Wishes".
Copics Used:
Bunny: E51, E53, E55, E57
Chick: Y13, Y15, Y17/ YR04, YR07
Lamb: N1, N2, N4, N5, N7
Cheeks and ears: R00, R01, R20
B000, B00, B02

Follow the High Hopes Blog as the DT Divas will be bringing Daily Inspiration for the month of March. Don't forget to follow us on Facebook, Instagram and Printerest.
Thanks for stopping by
and
Happy Stamping!
Supplies:

Friday, March 2, 2018

You Rock!

Hi Ai Fans!
Let me introduce you to "Rockin' Ruby" from Art Impressions! This set comes with Ruby and the sentiment, everything you need to make your card with! "Rockin' Ruby" looks so cute when you add an action wobble to her..... then she really does rock!
I am using paper from the Authentique "Studious" 6x6 collection! I used a Fancy Frames die set to create my card with. A simple but fun layout! I decided to paper piece her umbrella for a fun twist! I used my Brother Cut N Scan to cut Ruby out so I could pop her up on an Ai action wobble.
Here's a second card using more of the same papers.
Here you can see the action wobble and how it pops Ruby Up.
Click play to see "Rockin Ruby" in action

Copics Used:
Skin: E51, E11, E21, R20
Hair: T5, T7, T9
Reds: R24, R27, R29
Pants/ shoes: T3, T5, T7
Rocking Chair: E43, E44, E47

Happy Stamping!
Supplies:

Thursday, March 1, 2018

Feminine Fancy Challenge!

Happy March 1st!
The beginning of the month means it's time for a new challenge over on the Digi Doodle Challenge Blog! The theme this month is "Feminine Fancy". I'd love it if you would ink up your stamps and make them all girly, pretty and play along with us! I decided to use "Phoebe" from DDS
My card this time doesn't feature any Designer Papers at all! I only used purple and white cardstock. I embossed the purple cardstock using an embossing folder called "Kassie's Brocade". I used my Spellbinders Decorative Labels 28 and cut 3 layers of white cardstock. To enhance my card I used some Stickles for a glitter effect! I mean what girl does love some sparkle?!! A few Macarena corner die cuts and flowers finish it all off.
Here you can see the dimension I added by using foam tape between each layer.
Copics Used:
Skin: E00, E11, E21, R20
Hair: E53, Y21, Y23
Outfit: BV01, BV02, BV04, BV08
Flowers:  Y32, Y35, YR12, YR14/ YG23, YG25
Bird: B01, B02

I hope you will join us over on the DDS Challenge Blog for our month long "Feminine Fancy" Challenge!
Happy Stamping!
Supplies:

Tuesday, February 27, 2018

Spring Is In the Air!

Good day HH and OCS Fans!!
Spring is around the corner and for me that means "Spring Cleaning" When I saw this stamp from High Hopes I knew it would make the perfect "Spring Cleaning" themed card. This is the adorable "Tidy Up Tillie"!
I chose paper from the Lawn Fawn Perfectly Plaid Rainbow 6x6 collection and finished it off with some Doodlebug Enamel Dots! The sentiment is called "Spring Is In the Air" also by High Hopes! I decided this time to make my own card base with matching pink cardstock. The image and heart border are popped up with foam tape for extra dimension.
Here's my decorated inside with a sentiment I printed on my computer to match my theme!
Copics Used:
Skin: E00, E11, E21, R20
Hair: E53, E57. E59
Overalls: B93, B95, B97
Shoes: RV13, RV14, C1
Broom: E43, E47, YR21, YR24
Dust Pan: C3, C5, C6, C8
Feather duster: E43, E47, Y02, FY1
Outline and shadow: W1, B000

Happy Stamping:
Supplies:
SaveSave