Saturday, November 2, 2019

Turn That Frown!

Smile!
I don't know about you but this image from Gerda Steiner Designs just makes me smile! How fun is this image called "Upside Down Flamingo"? The sentiments that come in the set are just perfect for this adorable Flamingo!
I stamped and coloured "Upside Down Flamingo" with my Copic Markers. Each one is coloured a bit differently for a set of fun cards. My paper choices are different on each card. I used 6x6 collections from:
Doodlebug "Fun in the Sun" 
Echo Park "Best Summer Ever"
Echo Park "Summer Fun"
Each Flamingo is popped up with some foam tape for added dimension. Some added twine and enamel dots finish these cuties off.
On the decorated insides, I used the sentiment that was different from the one on the front.
Copics Used:
Upper Left Flaming: RV04, RV06, RV09
Upper Right Flamingo: FR01, RV04, RV06
Middle Flamingo: R20, E21, R22
Legs and beaks: YR21, YR23, N8

Remember we all smile in the same language! Have a happy day!
Happy Stamping!

Friday, November 1, 2019

Christmas 2019 "Two" Release!

Exciting News!
Today  marks the day of another Christmas 2019 Release from High Hopes Rubber Stamps! This release is really cool as some of the images are made to fit into 2 background stamps. How cool is that!! I am using the "Raccoon Gift" and "Birch Tree Background" on my card today!
I created this Window card using cardstock cut at 12x6" and then scored each end of the card at 3". Once folded I centered a Spellbinders "Labels 40" die and proceeded to cut out a window. I then traced the outside of the die onto my Design paper and hand cut it out to make a layered front. A few enamel dots in the corner finish off the front of the card.
I created a band out of matching papers from the Echo Park "Tis The Season" 6x6 collection. I added die cuts from some scalloped circles and trees I had on hand in my stash of metal dies. It helps perfectly to keep the card closed and adds a fun element to my card.
I stamped the "Birch Tree Background" first and then added the "Merry Wishes" sentiment and "Raccoon Gift" image. My MISTI sure was my friend for this card!
Here's a closeup of the die cuts and ribbon that make up the adorable band.
Copics Used:
Raccoon: N1, N2, n3, N5, N6, N8, R01, R02
Scarf: R24, R27, R29
Present: R37, R59, R89/ YG93, YG95, YG97
 Birch Trees: W00, W0, W1
Snow: C00, C0, C1, C2, C4
Sky: B0000, B000, B00

Make sure you head over to the High Hopes Blog or High Hopes Facebook Page to see all the inspiration from the Design Team using the New images!!
Happy Stamping!


Tuesday, October 29, 2019

Merry Christmas!

Happy Tuesday!
I'm so glad you stopped by today to see this adorable card using the High Hopes Stamps "Santa in Chimney". Santa images always make me smile as they bring up warm memories of Christmas when my girls were little and still believed in Santa. There is nothing better than seeing a child's excited face Christmas morning when they race downstairs to see what Santa left them.
To start I stamped my image with Copic friendly ink and then using my Copic Sketch markers coloured "Santa in Chimney" in. I recently got this die (Kopplade Ringar) from Magnolia-licious when they were clearing out items and decided to play with it today. I cut it out twice with green cardstock and then glued those together. Using a circle die I cut out a circle for Santa to peek through. Then I placed the rings onto my card and positioned one of the larger circles over Santa so that he is peeking through. I cut different patterns with the die from the Echo Park Story of Christmas 6x6 collection and glued them into the circle parts of the die.
Here you can see how Santa is on the inside of the card which lets him peek through when the card is closed. My sentiment is also from High Hopes and is called "Scripty Merry Christmas". The sentiment is from the new "Christmas 2019 Release". Check out the release for more adorable images and sentiments!
I found this cool wooden embellishment and using my Copic's, coloured it to match the card colours. Santa has some Stickles on his fur trim for a fun look! Lots of red sequins finish off my design!
Here's the inside where you can see Santa trying to get down the chimney. 
Copics Used:
Skin: E00, E11, E21, R20
Beard: C1, C2, C3, C4
Santa's outfit: R37, R59, R89/ C5, C6, C8, Y26
Santa's sack: E50, E51, E53, R37, R59
Chimney: E08, E95, E97, E99

Thanks for stopping by today!
Happy Stamping!!


Friday, October 25, 2019

Dog House Cubbies!

Hi!
 Since I left the Art Impressions Design Team, it's been so long since I inked up one of their images. I have to admit, I sure have missed colouring up some Ai fun! I picked up a few of their new images and got busy colouring! This is the Art Impressions super fun and interactive stamp set called "Dog House Cubbies". The set comes with all the images, some sentiments and the dies to cut everything out.
I inked up the stamp set and set abut colouring it with my Copic Markers. Then using the dies included in the set, cut everything out. Now all I had to do was decide which dogs to add where. There are so many possibilities as to how to display them! My paper today is from the Honey Bee "Great Outdoors" 6x6 collection.
I love that the dies cut out little doors so you can have a few dogs peeking out when you open the doors! Absolutely adorable!! I added some twine and a cute dog bone embellishment to finish off my card.
I popped the house up with some foam tape, and here you can see the added dimension it gives to my card.
Here's the decorated inside using one of the sentiments that comes with the set!
Copics Used:
BG13, BG15, BG18, BG32, BG34
G94, G99, Y26, Y28, YR65, YR68
W1, W3, W5
C0, C1, C2, C3, C4, C6
E21, E23, E25, E27, E29
E31, R33, E35, E37

Stay tuned for more cards with Art Impressions!!
Happy Stamping!


Tuesday, October 22, 2019

Sleigh Ride from Santa!

Welcome!
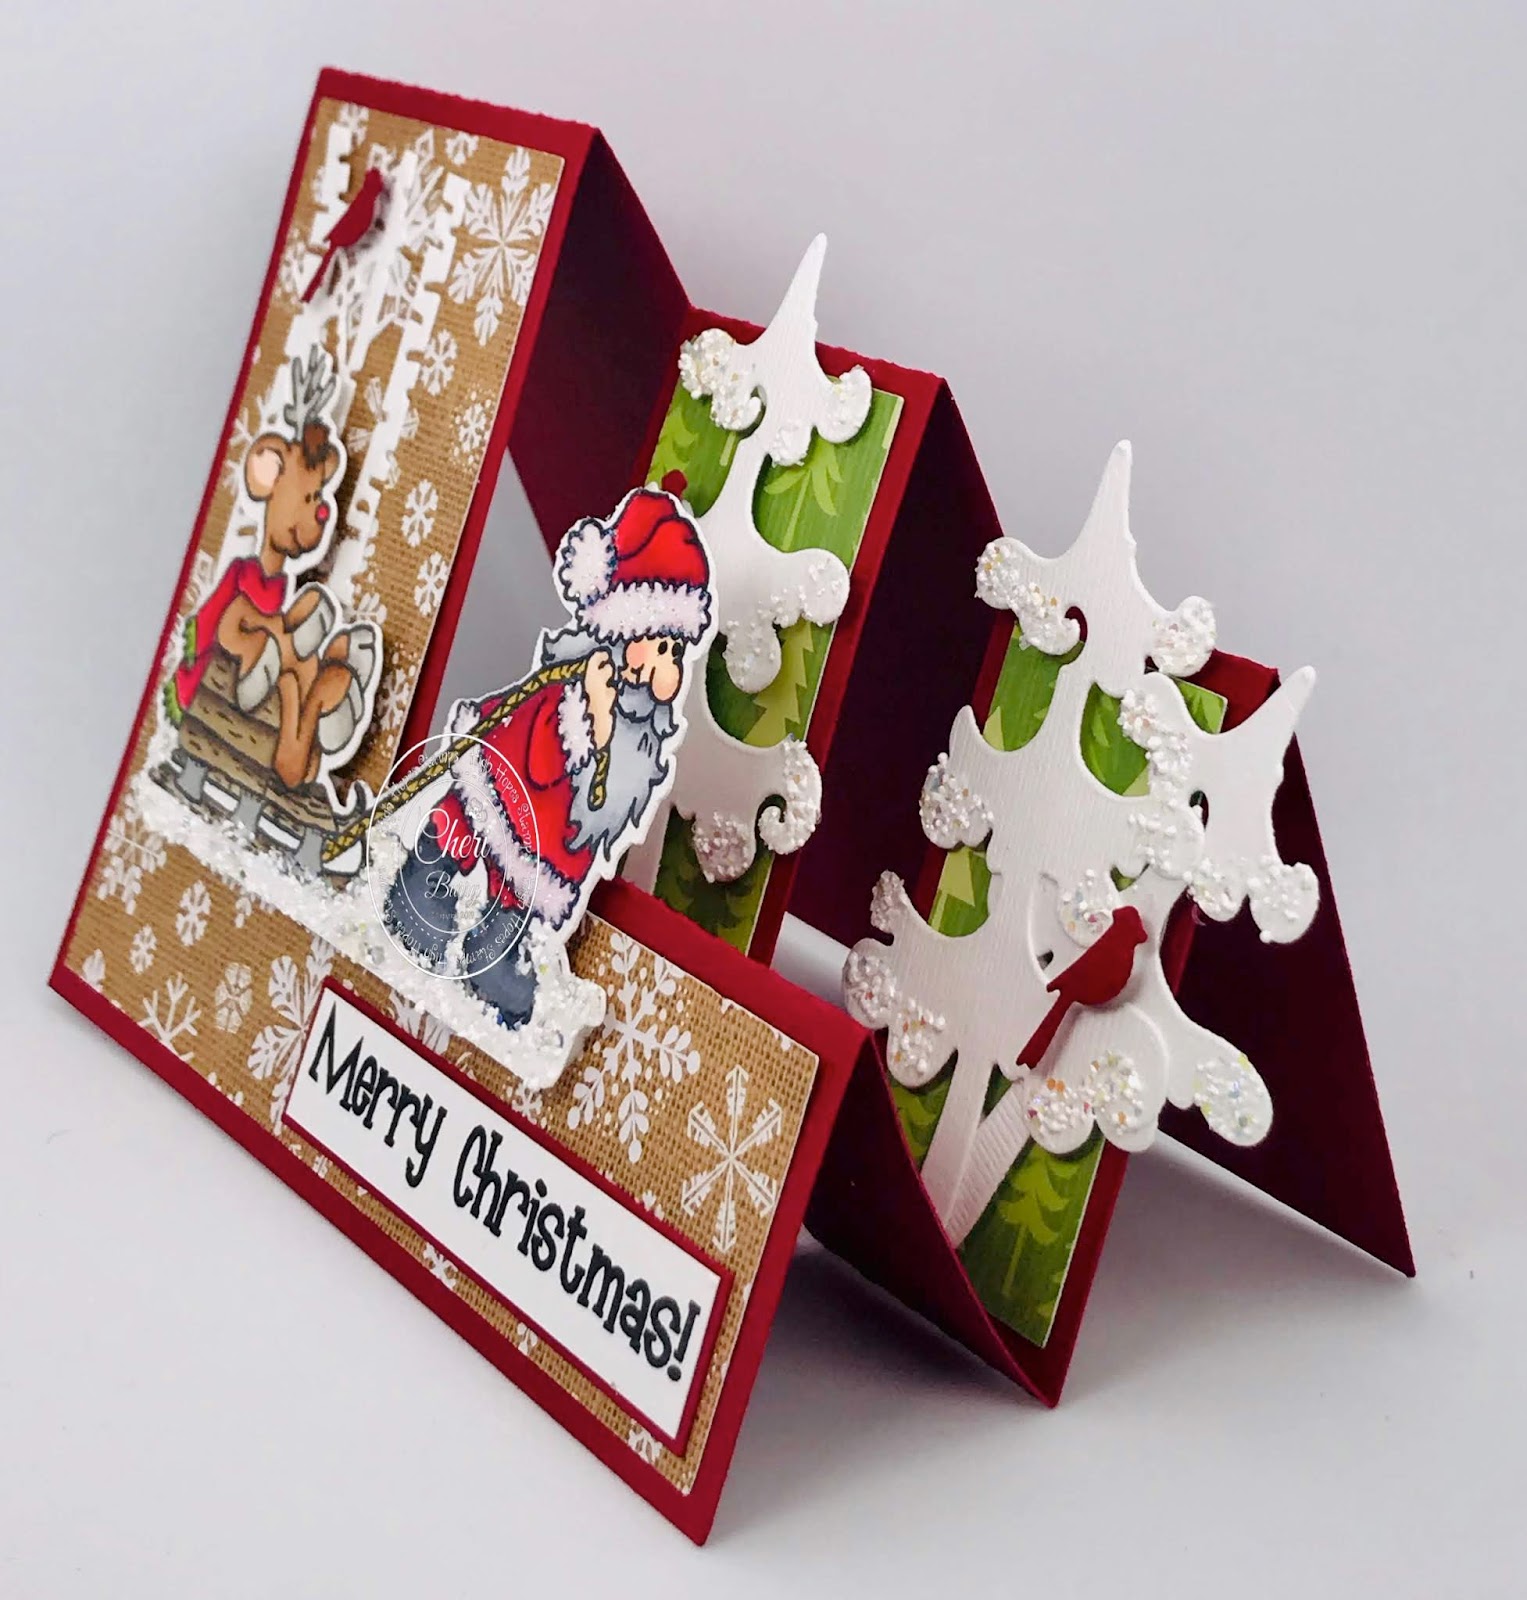
I haven't made a side step card in forever! When I saw this adorable image called "Reindeer Games" from High Hopes Rubber Stamps, I knew it would be perfect for a step card! Way to go Rudolph....finally Santa is pulling you for a change!
I used my Silhouette to cut out the card base and layers from an SVG file. Super easy as you don't have to think LOL, it's all done and cut for you. Just fold the card and glue on the papers and voila it's done!
I created a cute little scene for Santa to pull Rudolph on. The Birch Trees with cardinals is from Impression Obsession and the other trees on the "steps" are a Magnolia Doohickey Christmas Tree die. I added some Stampendous "Spoonful of Snow" to the trees and bottom of my coloured image. A bit of Crystal Stickles on Santa's fur added to the glitter on this card. The sentiment is from High Hopes and is called "Bold Merry Christmas".

I popped up the image and trees with some foam tape for a bit of added dimension. My paper today is from The Paper Studios Woodland Wonderland 6x6 collection. (I got it at Hobby Lobby).
Copics Used:
Skin: E00, E21, E11, R29
Hair & Beard: C1, C3, C4
Santa's Boots: C5, C6, C8
Reds: R35, R37, R39
Reindeer: E33, E35, E37, R01, W1, W3, W5
Sleigh: E43, E44, E47, E49, Silver wink

For more inspiration using High Hopes Stamps visit out Facebook Group or the Blog! The Design Team always posts such adorable creations!
Happy Stamping!


Friday, October 18, 2019

Furry Friends!

Hello!
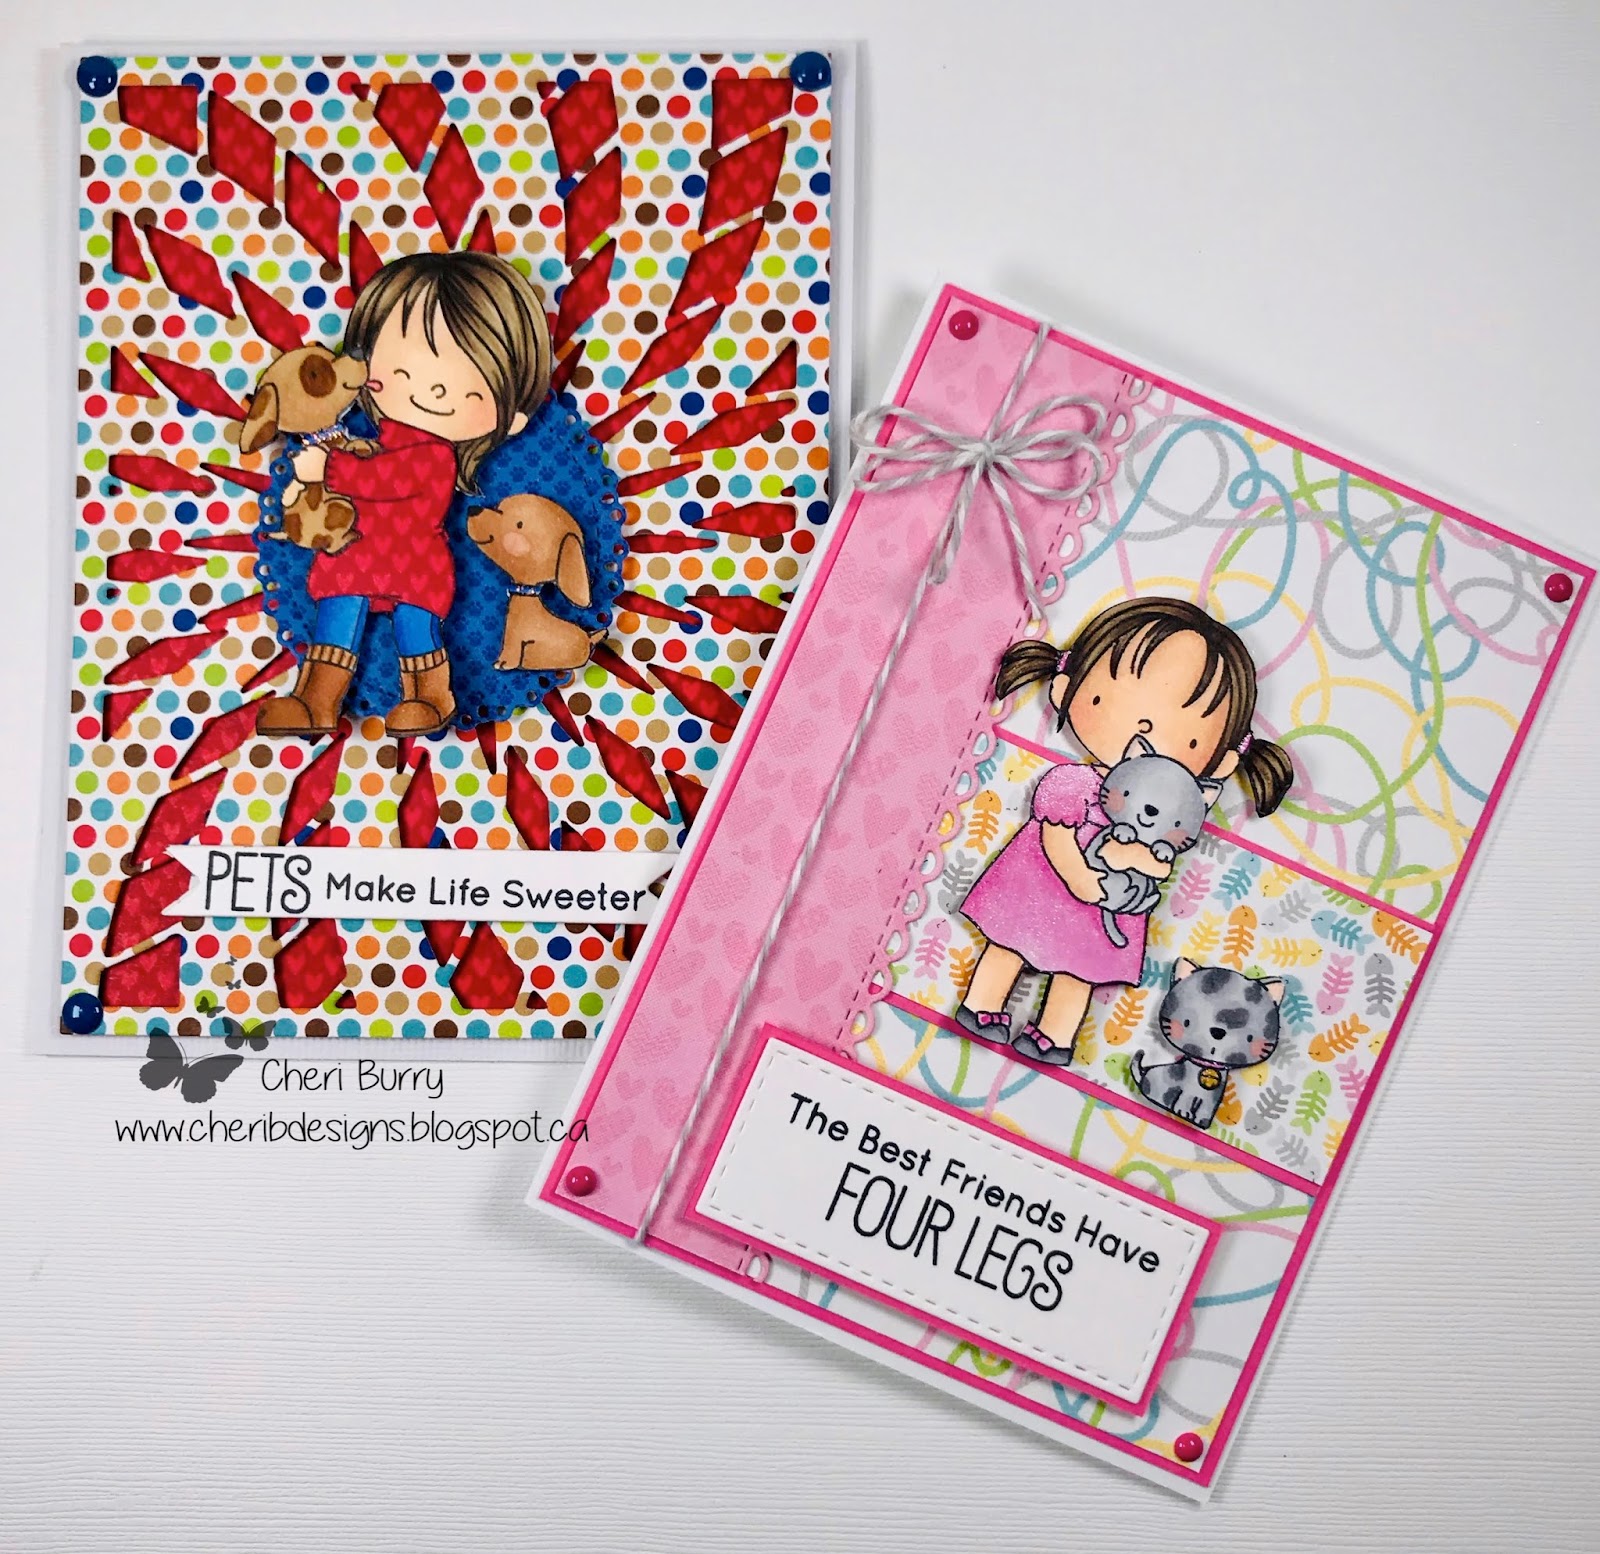
I don't know about you but I sure love my fur babies! They are totally part of the family and I swear they think they are human at times LOL. My dogs Stella and Ally sure do "make life sweeter". I'm trying to use the stamp sets I've been "collecting" (hoarding) for a while now and pulled this adorable set out from My Favourite Things called "New Best Friend".
I thought the Designer papers from Doodlebug called "Puppy Love" & "Kitten Smitten" went perfect with these images. On the dog card I used a background die from Gina Marie called "Star Burst Background" and popped it up with foam tape for dimension. On the kitten card I used a border die and some simple layers to create my card! Both cards have Doodlebug enamel dots on them to finish them off.
This sweetie has a paper pieced top and the dogs have Stickles on their collars.
Copics Used:
Skin: E00, E21, E22, R20
Hair: E43, E44, E47, E49
Jeans: B24, B26, B28
Dogs & Boots: E31, E33, E34, E35, E37
This cutie has Spectrum Noir Glitter pen on her dress, bows, hair ties and the cat's collar.
Copics Used:
Skin: E00, E21, E11, R20
Hair: E43, E44, E47, E49
Pinks: RV52, RV55
Kittens & Shoes: N1, N2, N3, N6

The best friends really are four legged! What unconditional love and devotion they give to you!
Thanks for stopping by today!
Happy Stamping!


Wednesday, October 16, 2019

Congrads!

Hello! 
I attended my Nephew's Grade 12 graduation and made this fun card to celebrate! My Nephew is notorious for last minute information and only told me 2 days before the event LOL. I found this cute digital image called "Con-grads" from Sassy Cheryl's Stamps that was perfect for my card!
I downloaded the image and resized it to what I needed for my A2 sized card. Then I coloured the "Con-grads" image with my Copic Markers. Taking some Distress Ink in Fired Brick and a stencil called "Brick Wall" by MFT, I created a background. I used yellow and Green cardstock to reflect my nephew's school colours and added the little tag sign with his High School's initials. A few gumdrops from Your Next Stamp finish off my design.
Here's my handsome Nephew who we teased that he looked like Harry Potter in his gown lol! I'm so proud of this young man and wish him well in his University endeavours!
This sentiment was a wooden stamp that I've had for years. I added a little $$ surprise inside that he can put towards something he needs or wants!

Copics Used:
Skin: E00, E21, E11, R20
Hair & Shoes: E23, E25, E27, E29
Cap & Gown: N5, N6, N8
Green: G16, G19
Yellow: Y35, Y38

Happy Stamping!

Tuesday, October 15, 2019

Penguin Block!

Happy Tuesday!
Penguins always makes me smile as they remind me of my Grandma! She just loved Penguins and had quite a collection. I have a few of hers and whenever I see them they bring back such warm memories. Meet "Penguin Block" from High Hopes Stamps!
I tried to colour my "Penguin Block" to match the papers from the Echo Park Celebrate Winter 6x6 collection. Lots of paper layers to create my design today. I added some Crystal Stickles to the Penguin's hats and the candy cane. A fun die cut layered snowflake and some enamel dots finish off my card.
On the decorated inside I used the New Sentiment from the High hopes "Christmas 2019" release called "Cozy Season".
Copics Used:
T01, T1, T5, T6, T8
R01,R22, R24, R27, R29
YR04, YR07, YR09
BG0000, BG000, BG01, BG72, BG75, BG78

Make sure you head on over to the High Hopes Blog and the High Hopes Facebook page to see what the Design Team has created to inspire you!
Happy Stamping!

Saturday, October 12, 2019

Fall Is In The Air!

Happy Thanksgiving!
Here in Canada it's our Thanksgiving weekend! I can't wait to dig into a scrumptious Turkey Dinner!!
Three times a year I make cards for my Hubby's special clients. Thanksgiving is one of them and here is the card I created. I used the Gerda Steiner Designs "Thanks A Latte" clear stamp set.
I am using Fall papers from the Echo Park "My Favourite Fall" collection. I stamped, coloured and cut my image out with various circle dies. Next I cut out a tag and added a bit of twine to it and layered it behind the image. I cut out leaves from various Fall colours and added a few to the card. Next I added polka dots to the Hedgie's scarf. 
Instead of adding the latte cup I added a tiny leaf in his hands. I created the sentiment on my computer using "fun house font".
On the inside I also made the sentiment using the "fun house font" and a quote from Emily Brontë.
I make 60 cards for Hubby to hand sign and send out in the mail. I try to pick an image that doesn't have too much colouring and shading as I hand colour each image and 60 gets to be a lot LOL.
Copics Used:
E31, E33, E35, E37, E39
Yr04, YR07, YR09
G21, G24, G28

I hope everyone has a very Happy Thanksgiving, sharing good times and food with family and friends!
Happy Stamping!


Tuesday, October 8, 2019

Merry Kiss-Moose!

Hello HH Fans!
Today's card uses an oldie but goodie called "Hopeful Moose" from High Hopes Stamps. I think he is just too sweet, waiting for someone to come along and kiss him under the Mistletoe LOL. I'm crossing my fingers for him!
I decided to make a simple look card to showcase "Hopeful Moose". I took my A2 card base and ran it through my Bigshot using a Snowflake Embossing Folder to create a pattered paper look. Then I just added a strip of paper to match my coloured image from the Bo Bunny Little Wonders 6x6 collection. The sentiment is also from High Hopes and is called "Merry Kiss-Moose". A few matching sequins and my card is finished!
Copics Used:
Moose: E42, E43, E44, E47, R01/ w2, W3, W5
Pinks: RV52, RV55
Blues: B34, B37, B39
Mistletoe: YG63, YG67, R24
Outline: B0000, B000, B00, B01

For more inspiration using High Hopes Stamps visit out Facebook Group or the Blog! The Design Team always posts such adorable creations!

Happy Stamping!